Change stream addresses
Every channel plays from a stream address at your provider. When the provider moves to a new server, gives you a new login, or a player needs .m3u8 instead of .ts, the addresses have to change. The Change provider window does this for many channels at once, with three tools next to How: New provider, Find & replace and .ts / .m3u8. Follow these steps to change your stream addresses.
Move to a new provider server or login
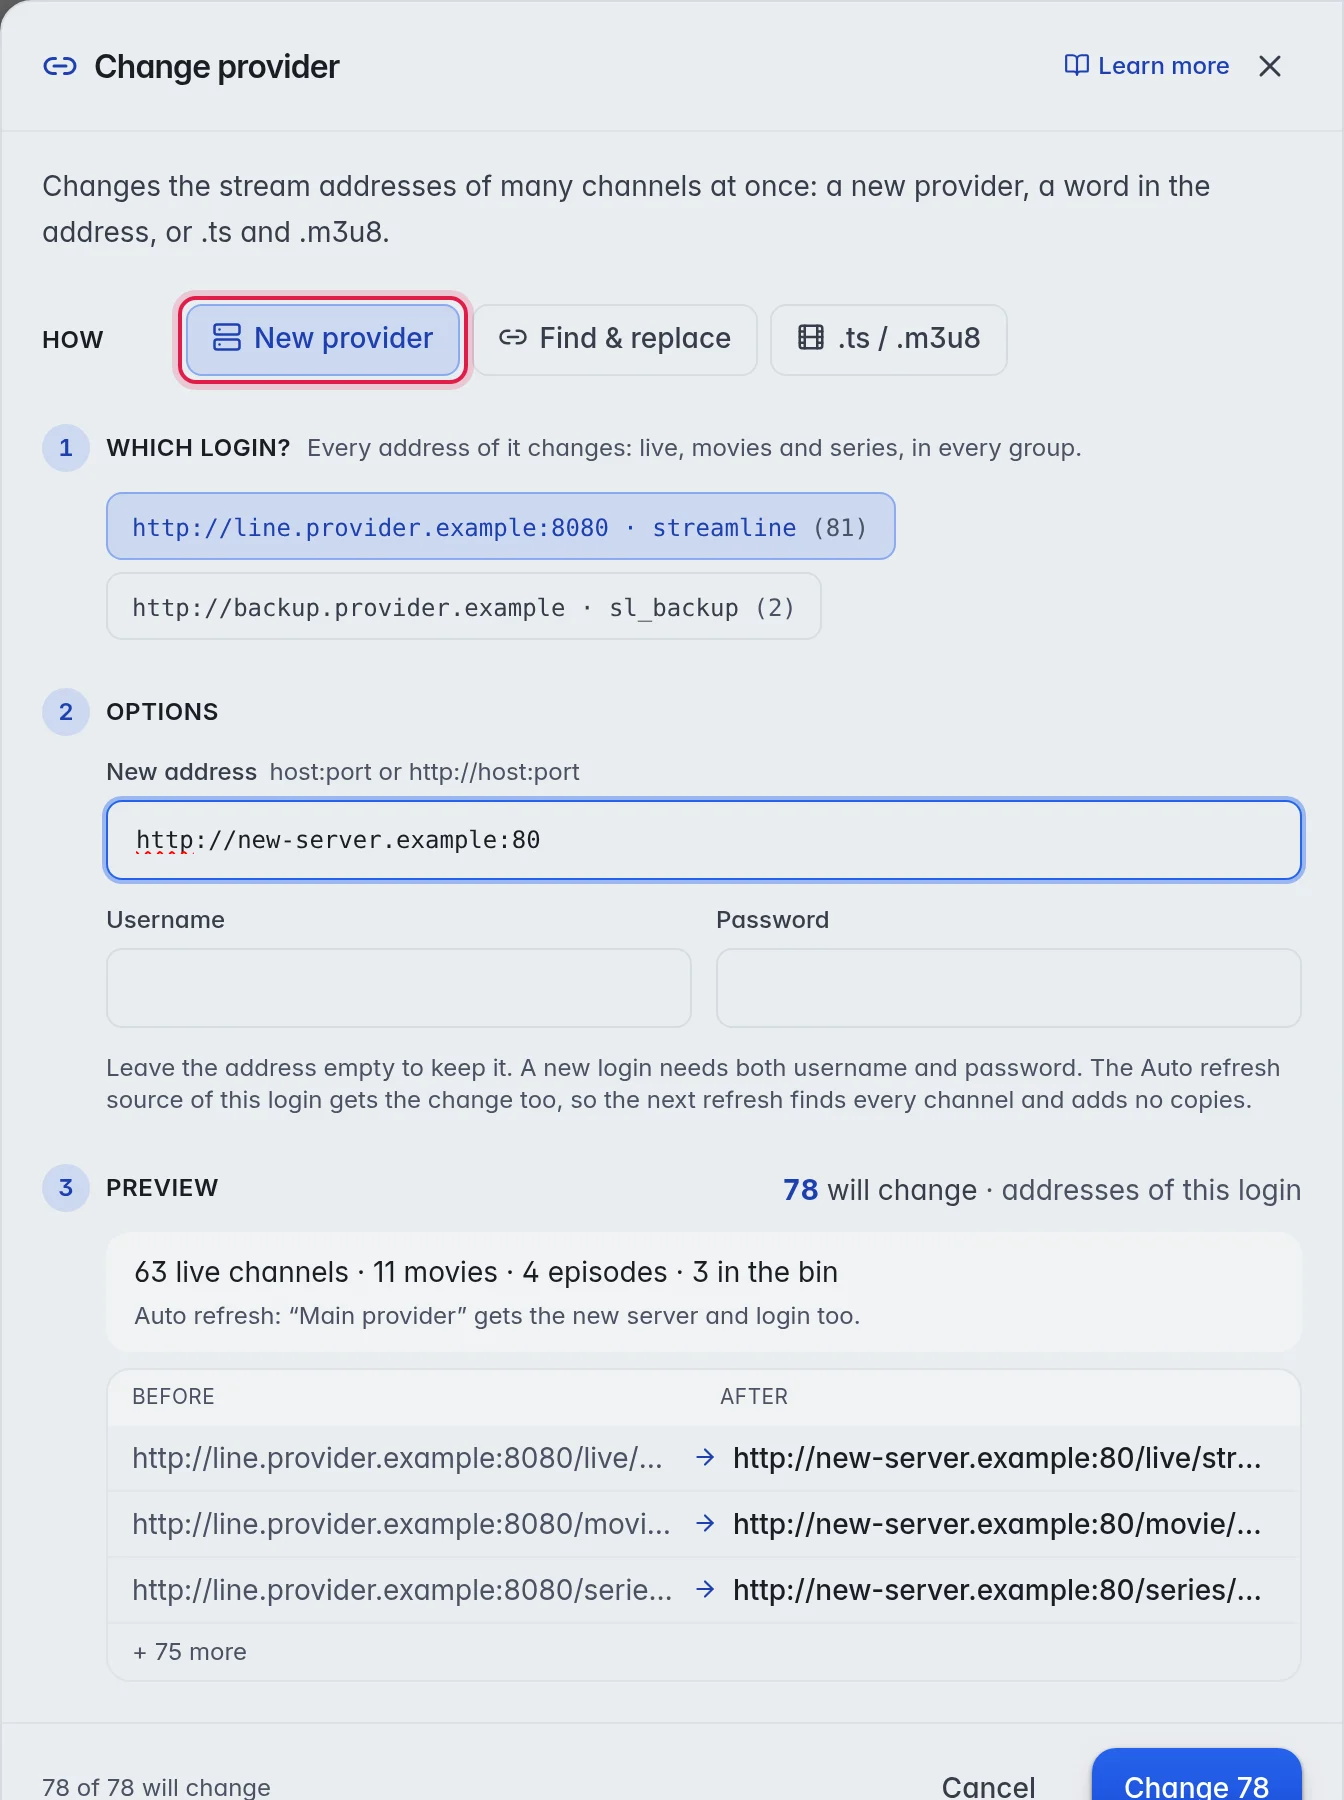
- Open Change provider: Click Tools in the top bar of the editor, then click Change provider… under Rename & provider. The window Change provider opens with New provider chosen next to How.
- Check the login: 1 Which login? shows the provider server and username your stream addresses use, with how many addresses carry it. When your playlist has two providers, click the one that moves.
- Type the new server: Under 2 Options, type the new address in New address, as host:port or http://host:port. Example: http://new-server.example:8080. Leave it empty to keep the server and change only the login.
- Type the new login (optional): Fill in Username and Password when your provider gave you a new login. A new login needs both. Leave them empty to keep the current one.
- Check the preview: 3 Preview shows how many live channels, movies and episodes change, which Auto refresh source changes with them, and one address of each Before → After.
- Change: Click Change N with your number.
This rewrites the server and the login in every stream address of that login: live channels, movies and series, in every group and in the bin, whichever tab you opened it from. The Auto refresh source of that login gets the change too, so the next refresh finds every channel on the new server and adds no copies. Live channels written as host/user/pass/number are included.
Typing the new server or login under Auto refresh → Change login does the same: your channels move with it.
Replace text in the addresses
- Choose the tool: In the Change provider window, click Find & replace next to How.
- Choose the channels: Under 1 On what?, pick as above.
- Type the old and new text: Under 2 Options, type the part to change in Find and what should be there instead in Replace with. Example: find "old-server.tv:8080", replace with "new-server.example:80".
- Choose which addresses: In the stream addresses is on by default. Switch on In the logo addresses to change logo addresses too.
- Check the preview: 3 Preview shows the addresses Before → After.
- Change: Click Change N with your number.
Switch between .ts and .m3u8
- Choose the tool: In the Change provider window, click .ts / .m3u8 next to How. It is offered on Live TV only.
- Choose the channels: Under 1 On what?, pick as above.
- Choose the format: Under 2 Options, pick HLS (.m3u8) or MPEG-TS (.ts).
- Change: Check 3 Preview, then click Change N with your number.
The options:
- MPEG-TS (.ts): The usual format for player apps such as TiviMate. Most providers stream live TV this way.
- HLS (.m3u8): Plays better in some players and on some smart TVs. Try it when channels load but do not play.
Note: .ts / .m3u8 only changes live channels from Xtream-style providers. Other addresses are left as they are and do not count in the preview.
Good to know
- Important: Try the new server on one channel first. Open one channel, put the new server and login into its stream address by hand and click Quick check on the Checker tab. When it plays, change the whole login here. This is so that a typing error does not stop every channel at once. More in Quick check.
- Typed something wrong? Open New provider again, pick the new login under Which login? and type the right server or login. A big playlist cannot be undone with Undo, so this is the way back.
- Each customer can have their own provider login. The tools here change the addresses in your playlist, not the logins of your customers. More in Provider logins.
- Undo in the top bar takes the run back, except New provider on a big playlist (more than 50,000 addresses). More in Undo.